
How To Topic 38 · House interiors
How to Explore and Furnish a House Interior in HxAR
Step inside the house you created with House Plan. Explore its rooms and stairs in Camera view, adjust your viewpoint and, as the owner, add furniture and finishes. This guide follows article 37 from the house exterior into the interior.
What this guide achieves
Enter a house, explore the interior and save owner changes to its furnishings and finishes.
- Topic
- 38
- Starting point
- A house placed in the HxAR Metaverse with a valid exterior door; use its owner account to edit
- Guide time
- About 12 minutes
- Screen status
- Next app update preview
Quick walkthrough
Explore and personalise the interior in ten steps.
Start with the published house from article 37. Learn the movement controls first, then select the tools you need for decorating.
- 01
Visit the house on foot
Open the grouped property in Property Management and choose Visit Location, or travel to its location in the HxAR Metaverse. Leave the ship or vehicle and approach the house on foot.
- 02
Approach the exterior door
Face a valid ground-floor entrance and walk towards the doorway from outside. The app opens the interior loading screen as you approach. Wait until House Interior appears; a visible house shell without a valid exterior door cannot provide this entry route.
- 03
Get comfortable with Camera view
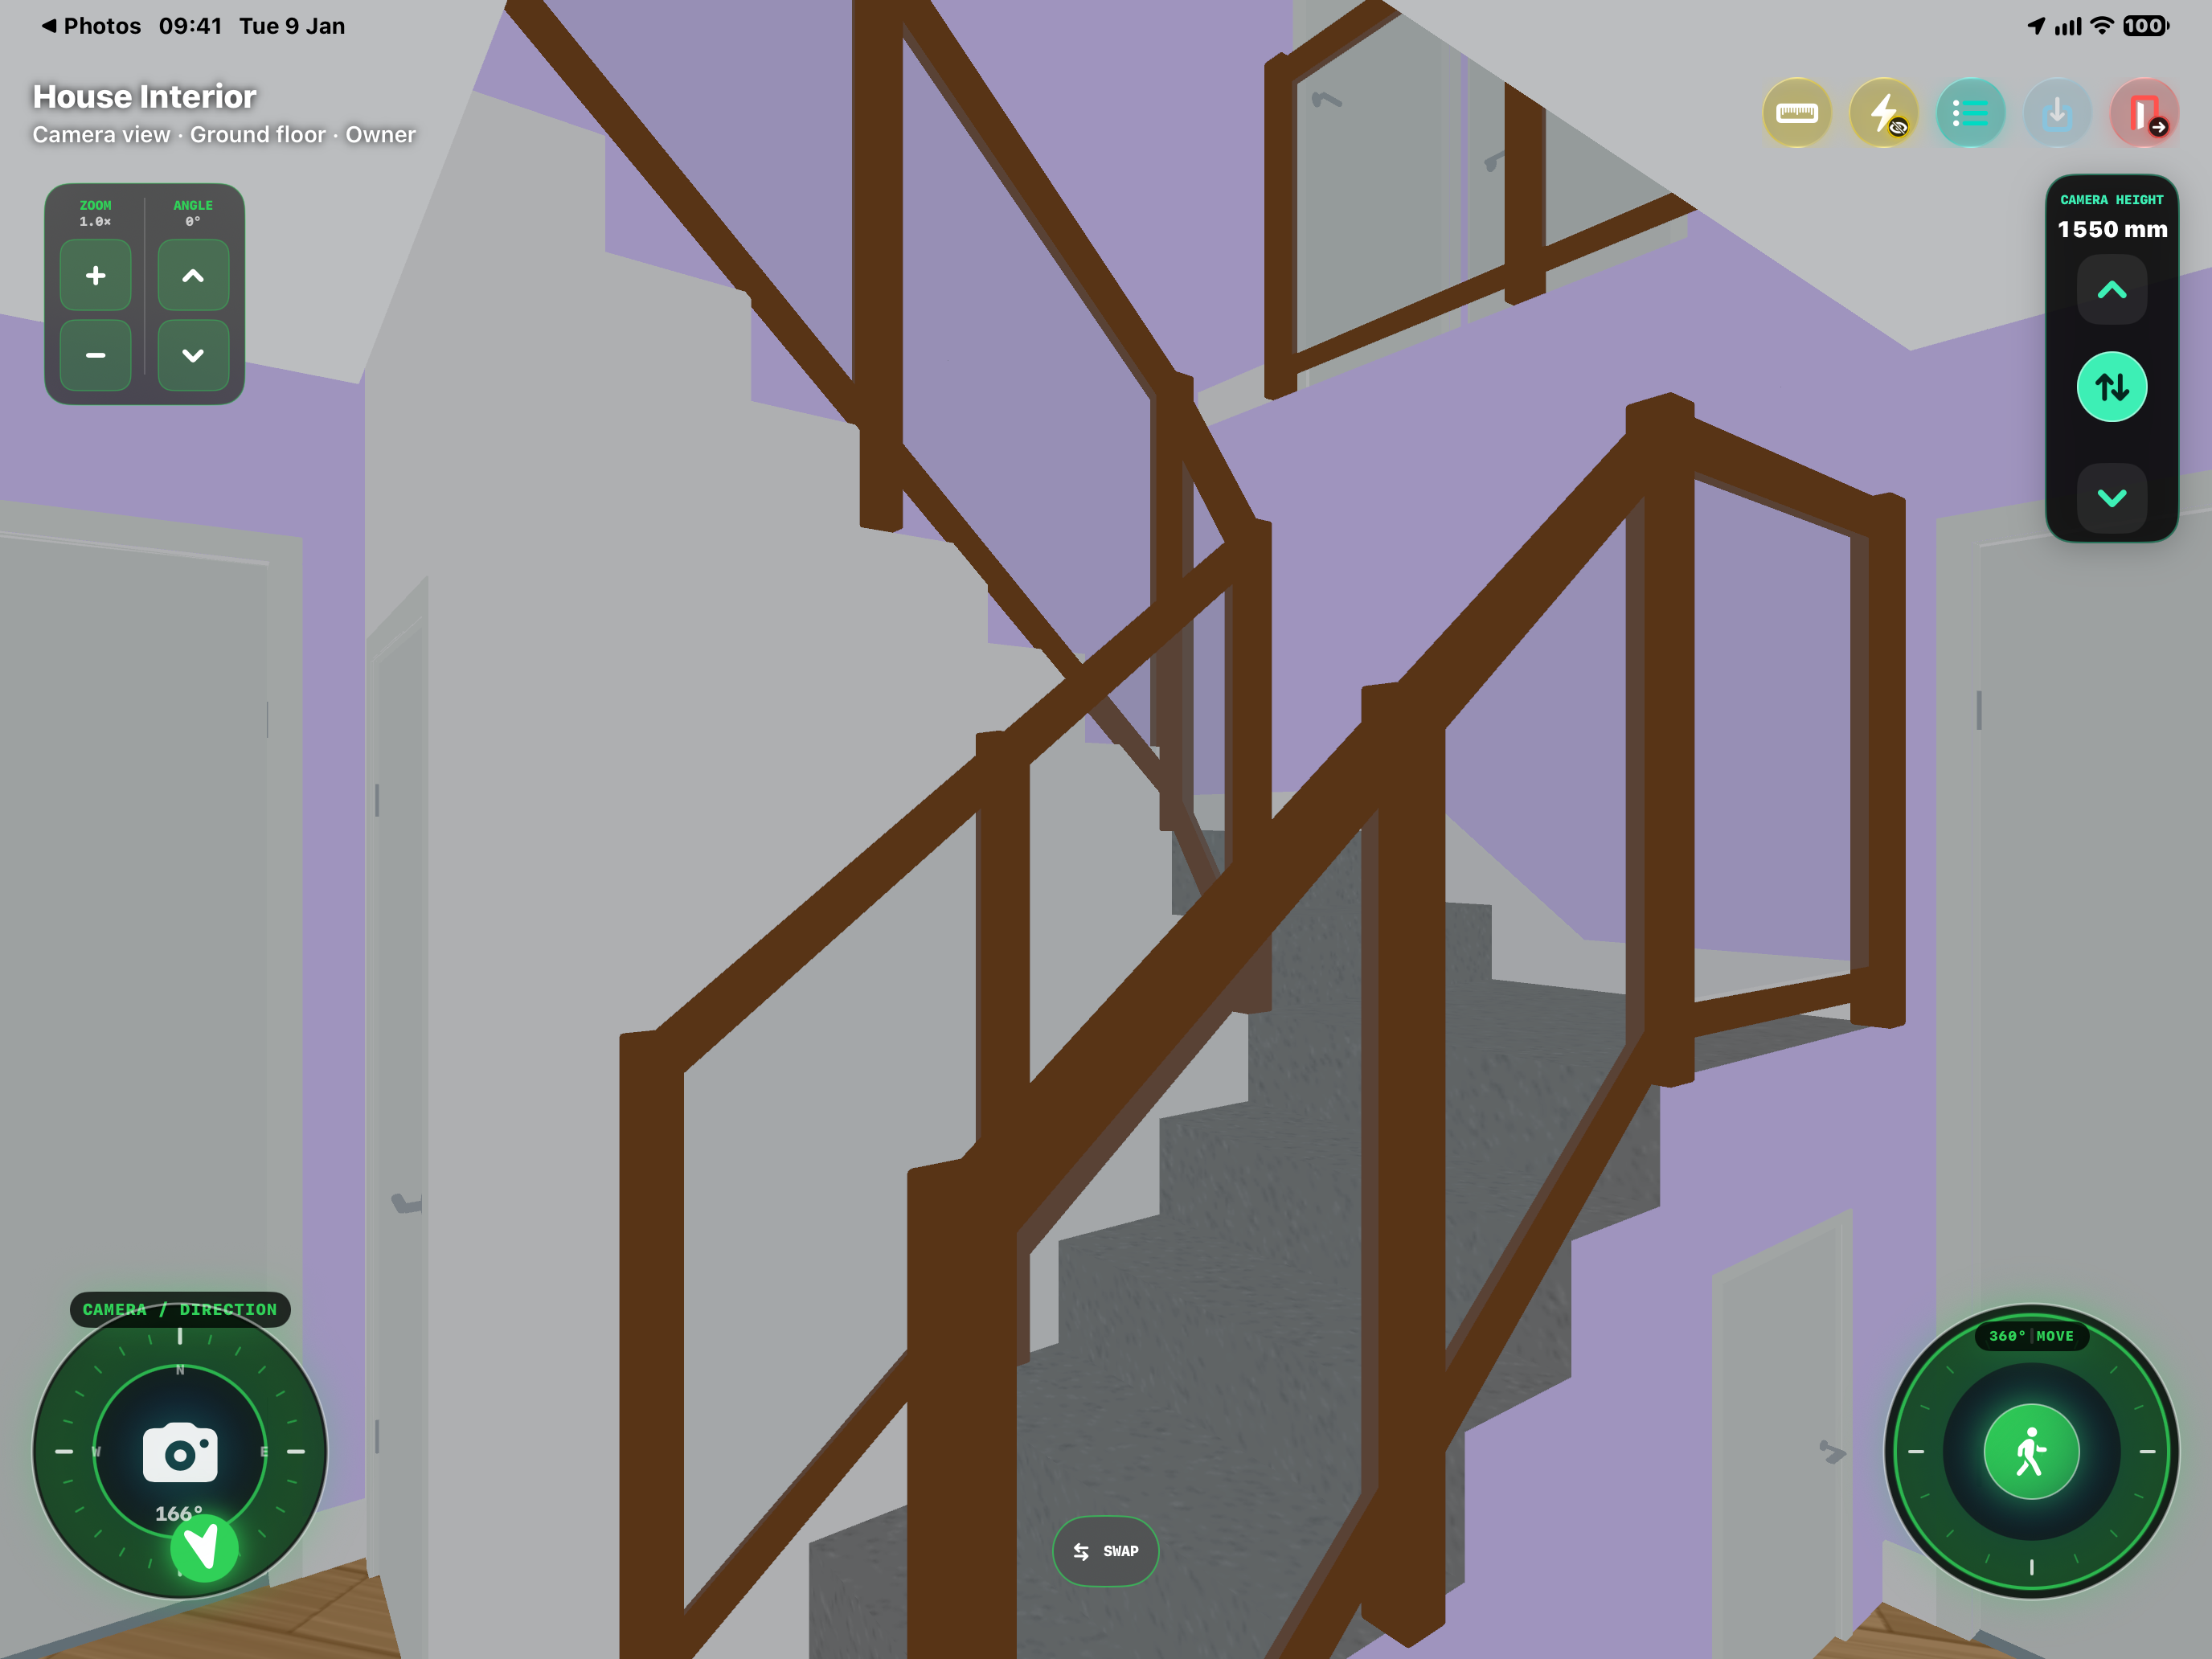
Read the floor name below House Interior. Use the CAMERA / DIRECTION dial to turn and the 360° MOVE joystick to move. Release the movement joystick to stop. SWAP exchanges the two controls between the left and right sides.
- 04
Adjust the view
Use ZOOM + and − to change the field of view, ANGLE arrows to look up or down, and CAMERA HEIGHT to raise or lower your viewpoint within the available clearance. You can also swipe across the scene to look around.
- 05
Explore connected rooms and stairs
Tap an interior door to open or close it, allow any room-loading message to finish, then move through the opening. Step clear before closing the door. Follow an existing staircase to another floor and check the floor name as you arrive.
- 06
Choose your interior tools
Tap the list icon at the top to open Toolbar tools. Select the tools you want and tap Done. For an owner, useful starting choices include Paint, Bedroom furniture, Modules, Name rooms and Undo. Some tools appear only after selecting a suitable wall or floor.
- 07
Try a wall colour or floor finish
As the owner, tap a supported wall or floor surface nearby, then choose Paint. Review Wall colour or Flooring, choose the colour or finish and tap Apply. A wall change affects the selected face; a floor finish applies to that room.
- 08
Add suitable furniture
For bedroom furniture, press and hold a clear floor position to mark it, then open Bedroom. Choose a bed or cupboard preset and follow its placement controls. Use Modules separately for bathroom modular walls and their supported bathroom fittings.
- 09
Save and confirm your changes
Tap Save house and wait for House saved or the saved checkmark. Painting and some furniture edits remain session changes until saved. If an item panel reports Save not confirmed, retry the save before leaving.
- 10
Leave the interior
Use the red Exit house control to return outside. If changes are still pending, the app attempts to save them first. If saving fails, choose Try again or Stay to keep working; Exit without saving leaves without preserving the unsaved changes.
From House Plan to House Interior
Article 37 covers the land outline, walls, floors, roof, doors and placement of the house. Continue here once the house is in the shared world. Visit Location takes you to its location; entering the house happens when you approach a suitable exterior door on foot.
The interior is a camera walkthrough. The subtitle identifies the current floor, such as Ground floor or Attic. Owner appears after the app confirms editing permission. Visiting a house does not grant permission to change it: interior building tools require ownership of all the land beneath that building.
The screenshots show a house that has already been developed. Its staircase, furniture and finishes are examples of what has been added, rather than an automatic result of drawing a House Plan.
Understand the controls around the room
The green controls move your viewpoint through the house. Choose a comfortable layout with SWAP before exploring.
CAMERA / DIRECTION
Turn the dial to face another direction. Its degree readout shows your heading. Swiping across the scene also changes where you look.
360° MOVE
Drag the movement joystick in the direction you want to travel and release it to stop. Walls, closed doors and placed objects can block your path.
ZOOM and ANGLE
The + and − buttons zoom the camera view. The arrows under ANGLE look up and down. Zoom changes the view rather than moving you across the room.
CAMERA HEIGHT
Raise or lower your eye level. The millimetre readout describes camera height above the surface you stand on, including a stair tread. The available range depends on clearance.
SWAP
Exchange the movement joystick and direction dial between the left and right sides. Swapping stops the current movement.
Move through doors, stairs and the attic
Tap an interior door to open it, then move through the doorway. The app may display a room-loading message before opening the view beyond. To close the door, move clear of its opening first.
Walk along a staircase that has been added to the house to reach the connected level. The floor name updates as you move between levels. An upper floor or attic needs a usable connection; simply including a floor in House Plan does not add a staircase.
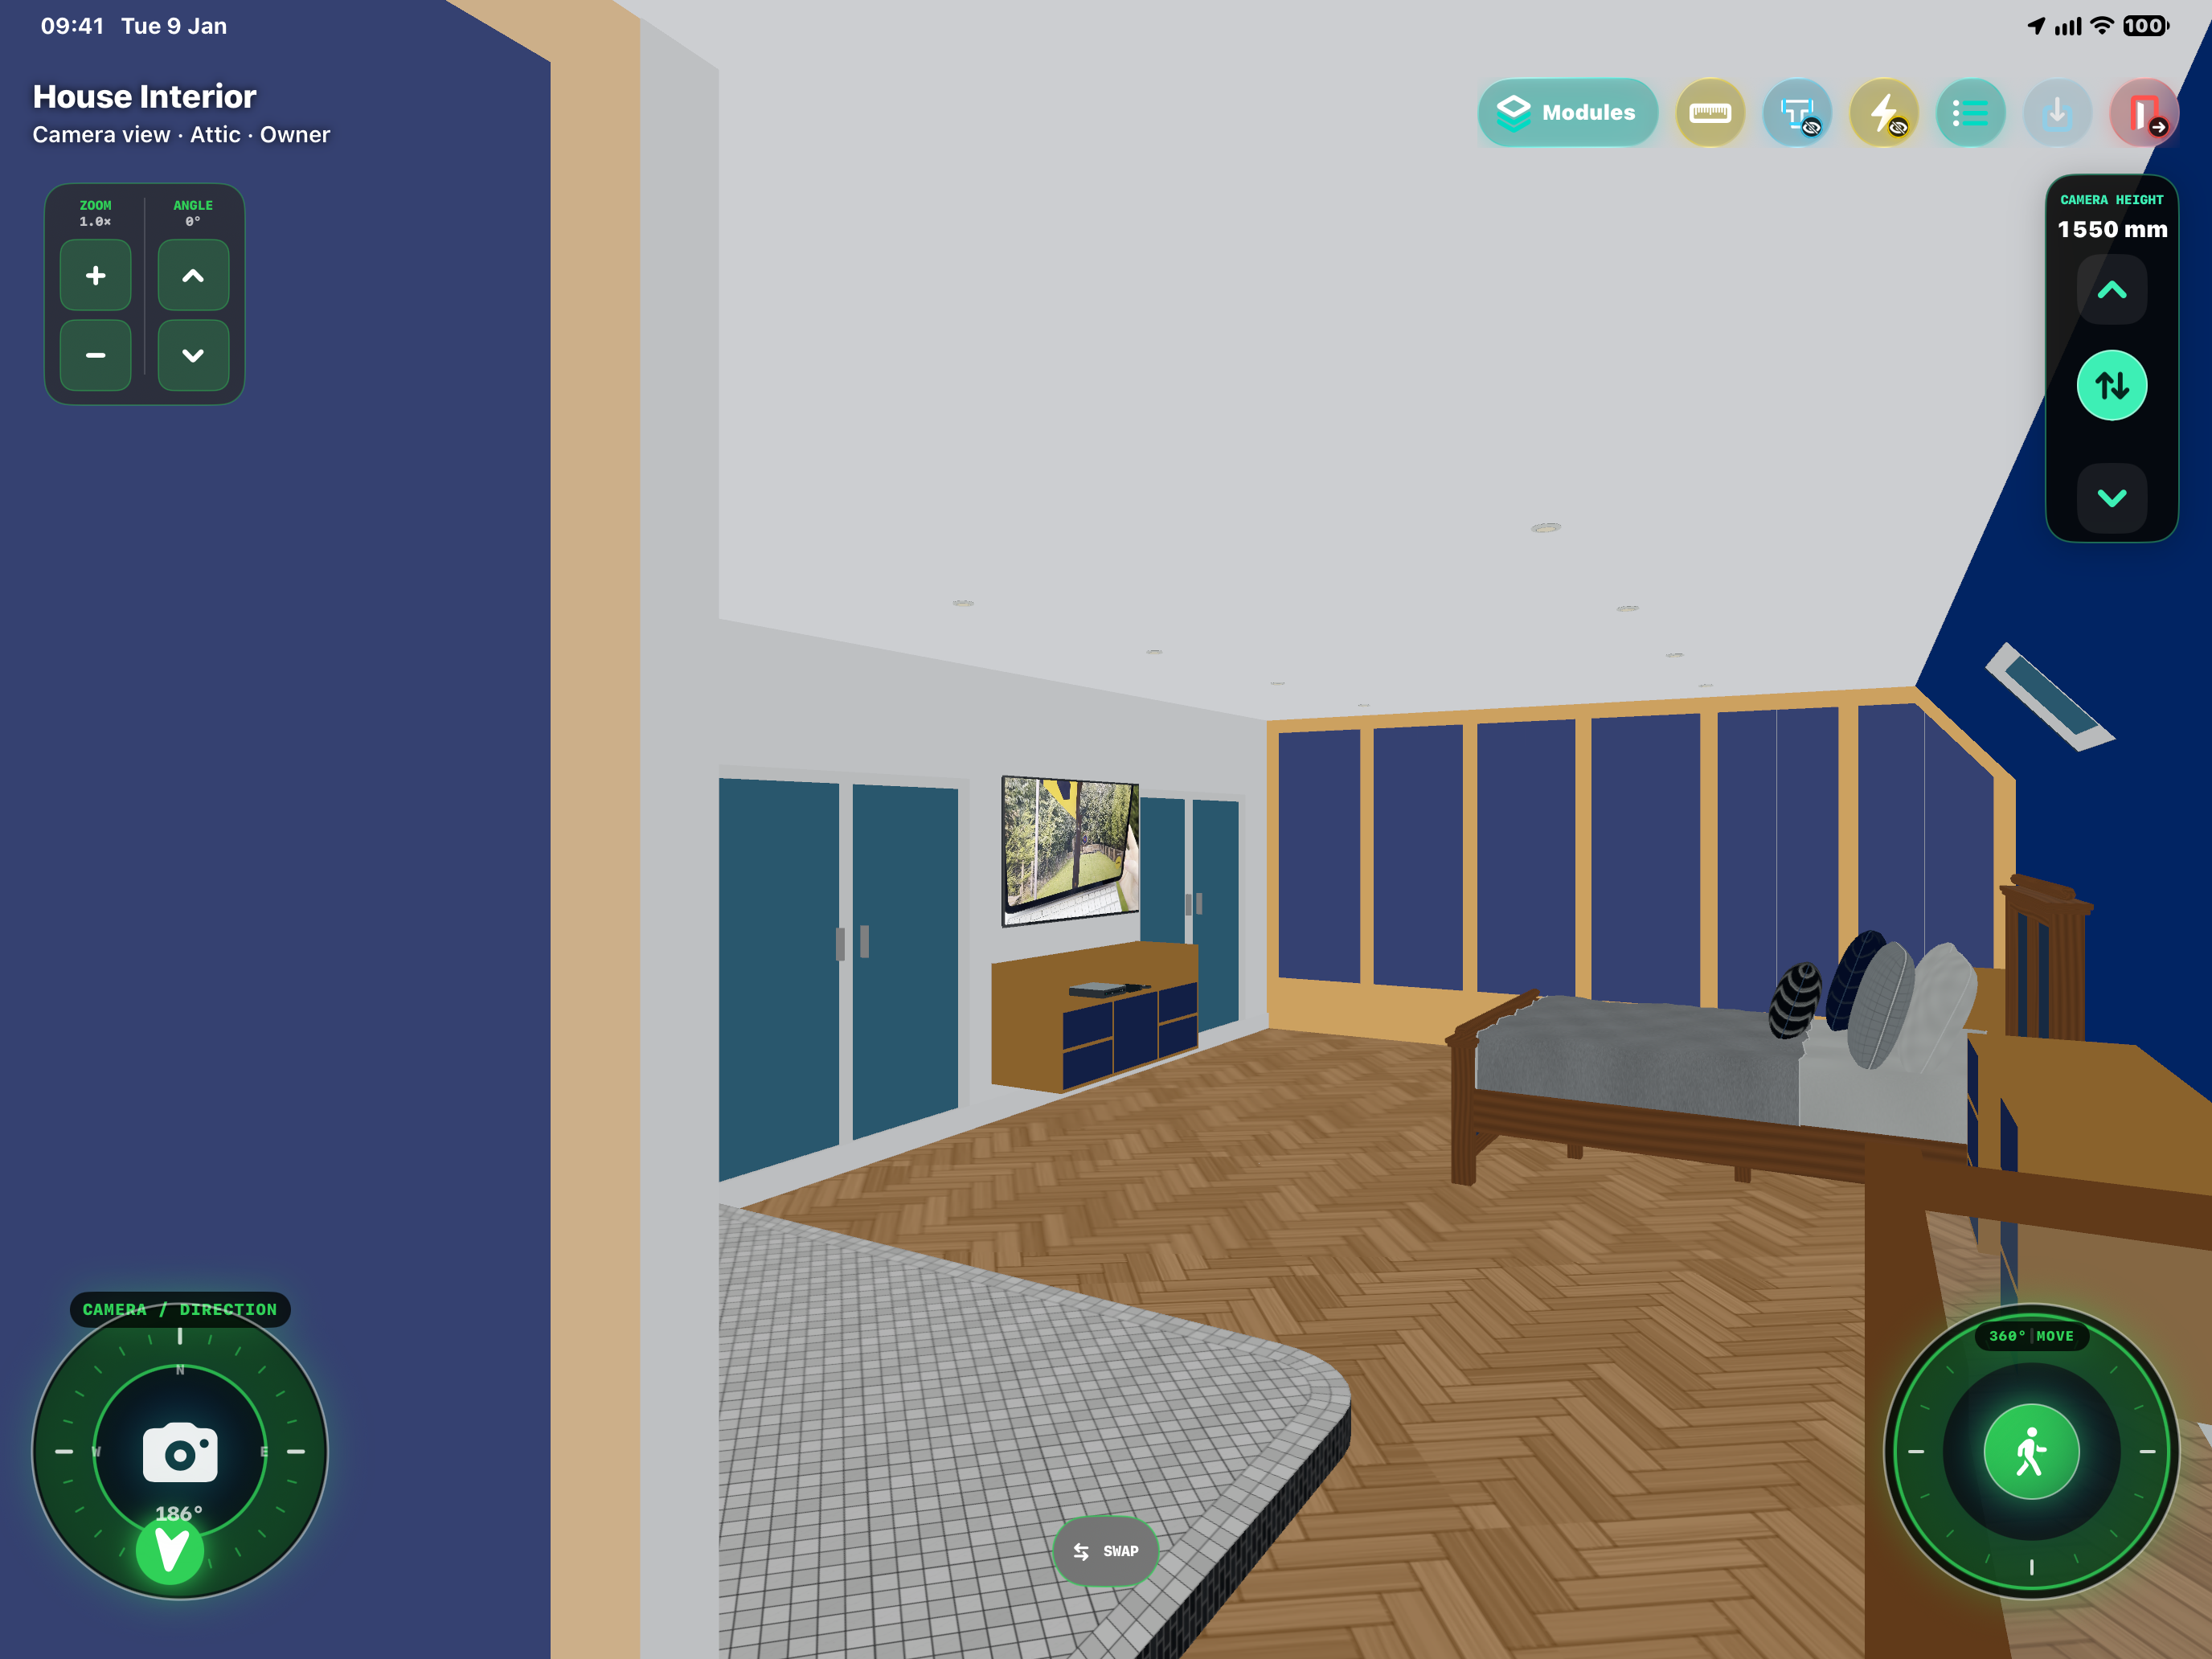
The attic example below shows a bedroom beside a tiled area, with sloping walls and a roof window. Use ANGLE and CAMERA HEIGHT to inspect the space, and keep the route between the stairs and doors clear when placing furniture.
Use the list icon to choose Toolbar tools
The list icon opens Toolbar tools. Tap a tool to select it for the top toolbar, then choose Done. If the selected tools extend beyond the available width, scroll the toolbar horizontally.
Tool selection and tool availability are separate. A selected tool can stay hidden until you own the building and have selected the right surface or position. For example, press and hold the floor to mark a building position before looking for Bedroom furniture.
Name rooms opens the room-plan workflow after selecting a floor position. Room names and room types are separate settings: a room named Bathroom still needs its Bathroom or Shower type for tools that require that type.
The screenshot’s ruler is Tape measure: tap two visible surfaces to measure the straight distance in millimetres. The lightning control shows or hides available electricity services; Plumbing visibility reveals available pipework. Showing one service view hides the other. Their buttons depend on the content installed in the house.
Continue with article 39 to follow the gas service from the meter to the boiler and use Plumbing visibility to inspect concealed pipes.
Change wall colours and flooring
Select Paint in Toolbar tools. Tap a supported wall face or floor within reach, then tap Paint to open Wall colour or Flooring. Select a colour or finish and use Apply to keep the change in the current editing session.
Flooring choices include Tiles, Laminate, Carpet, Karndean and Natural wood. A floor finish belongs to its room, so adjoining rooms can have different finishes. The wall colour applies to the selected face.
Check the result from more than one angle and use Save house when ready. Apply closes the paint panel; it is not the final shared-house save.
Add bedroom furniture and bathroom modules
Bedroom furniture and Modules open different catalogues. Select each in Toolbar tools when you need it. The exact options also depend on the selected surface and room.
For Bedroom, first press and hold a clear floor position. Open Bedroom, choose the oak and navy bed or a cupboard preset, set the available dimensions and tap a clear wall within three metres. Cupboard presets include TV + storage, Six drawers, TV cabinet and Dressing table. For a bed, adjust the preview and use Add or Done. Cupboards appear when a valid wall is selected; hold one to move it along the wall and tap its measurements for options, then use Save house.
Modules currently offers Bathroom Modules. Choose a modular wall, set its width and depth, select its image and place it against a suitable wall within three metres in a Bathroom or Shower room. Adjust the preview and choose Add or Done. A saved module can then support its offered basin cabinet or wall-hung toilet.
Follow any placement refusal shown by the app and leave doors and walking routes clear. Item panels may attempt a save when you finish, but always check the save result before leaving the house.
Save, undo and return outside
Save house publishes the edited house, including supported furniture and surface finishes. Wait for House saved or the saved checkmark; the checkmark indicates that the current content has been saved and has not changed since.
If an item reports Save not confirmed, its change may still exist only in the current session. Retry its save or use Save house. A pale or disabled save icon alone is not a new save confirmation.
Add Undo through Toolbar tools to undo an available edit. If you undo a change that was already saved, save again to publish the reverted result.
The red Exit house control returns outside. It attempts to save pending changes first. If the app shows Walls not saved, read the reason: Try again retries, Stay keeps you inside, and Exit without saving abandons the unsaved changes.
If a room or tool is unavailable
Cannot enter: check that the house has been placed in the Metaverse, has a valid ground-floor exterior door and can be approached on foot. Finish outdoor editing before approaching. See article 37 for the entrance and publication steps.
Cannot move through: open the door, wait for any room-loading message and check for a wall or placed object blocking the route. Use an existing stair connection to reach another floor.
Missing owner tools: check the account and wait for ownership checking to finish. Choose the tool in Toolbar tools, then select the required floor position, wall or room type. Choosing a tool does not override these conditions.
Changes do not appear saved: read the save message and retry. Keep the interior open with Stay while resolving a failure if you want to preserve your current editing session.
Guide path
Move through HxAR one topic at a time.
New topics will be linked back into earlier guides whenever one action leads naturally to another.
Helpful now